Git: from beginner to advanced user
A journey with Git command line.

Disclaimer
This article uses the Git command line exclusively.
- The command line is the only place you can run all Git commands.
- If you know how to run the command-line version, you can figure out how to run the GUI version.
- Your choice of graphical client is a matter of personal taste; all users will have the command-line tools installed and available.
Many users will use only a limited subset of Git commands, but don't forget that Git is still under active development. You can find all the changelogs on GitHub.
Beginner
Installation
The easiest way to install Git and to keep up-to-date is to use a package manager.
On Windows you can use Chocolatey:
# Install Git
$ choco install git

# Update Git
$ choco upgrade git
On macOS you can use Homebrew:
# Install Git
$ brew install git

# Update Git
$ brew upgrade git
Verify if the installation was successful:
$ git --version
git version 2.23.0
Configuration
Configure your name and email that will be associated with your Git commits.
git config --global user.name "John Doe"
git config --global user.email "john.doe@example.com"
Tip: If you want to use different email addresses depending on the repository, you can use the following configuration. This is useful if you have personal and professional email addresses associated with your GitHub account.
# Remove your email from the global configuration
git config --global --unset user.email

# Instruct Git to avoid guessing defaults for user.email and user.name
git config --global user.useConfigOnly true

# Because you haven't configured your email globally, you will see this error when trying to commit:
# fatal: no email was given and auto-detection is disabled
# To fix it, set your email in each repository:
git config user.email "john.doe@example.com"
To avoid problems in your diffs, configure Git to properly handle line endings.
# Configure Git on OS X or Linux to properly handle line endings
git config --global core.autocrlf input
# Configure Git on Windows to properly handle line endings
git config --global core.autocrlf true
Because you don't want to type your username and password every time Git communicates with the remote repository, you should configure a credential helper.
# Configure Git on OS X to use the osxkeychain credential helper
git config --global credential.helper osxkeychain
# Configure Git on Windows to use the credential manager
# For Git for Windows 2.29+, use manager-core (or just manager in newer versions)
git config --global credential.helper manager
You might want to create a global .gitignore to exclude your OS files, for example. You can use gitignore.io to generate your .gitignore file.
git config --global core.excludesfile ~/.gitignore_globalIf you work behind a proxy you can configure Git to use the proxy globally. If you're having HTTPS issues, check out the documentation .
git config --global http.proxy [protocol://][user[:password]@]proxyhost[:port]Everyday user
Updating projects
git fetch
The git fetch command downloads commits, files, and refs from a remote
repository into your local repository. Git isolates fetched content by updating
remote-tracking branches, not your local branches or working directory.
git pull
The git pull command is used to fetch and download content from a remote
repository and immediately update the local repository to match that content.
The git pull command is a combination of two other commands, git fetch
followed by git merge. You can use git pull --rebase if you want to use
git rebase instead of git merge.
Note: Since Git 2.27, Git will warn you if you haven't set a default reconciliation strategy. You can configure your preference with:
# Use merge (default behavior)
git config --global pull.rebase false
# Use rebase
git config --global pull.rebase true
# Only fast-forward (fail if not possible)
git config --global pull.ff only
git merge
The git merge command will combine multiple sequences of commits into one
unified history.
Assume the following history exists and the current branch is master:
           E ─ ─ ─ F ─ ─ ─ G   feature
         ╱
A ─ ─ ─ B ─ ─ ─ C ─ ─ ─ D      master
Then git merge feature will create a new merge commit that combines the
histories of both branches. This merge commit (H) has two parents: the current
tip of master (D) and the tip of feature (G). Git automatically
determines how to combine the changes from both branches.
           E ─ ─ ─ F ─ ─ ─ G     feature
         ╱                  ╲
A ─ ─ ─ B ─ ─ ─ C ─ ─ ─ D ─ ─ H  master
A fast-forward merge can occur when there is a linear path from the current branch tip to the target branch.
Assume the following history exists and the current branch is master:
           E ─ ─ ─ F ─ ─ ─ G   feature
         ╱
A ─ ─ ─ B                      master
Then git merge [--ff] feature will only update the branch pointer, without
creating a merge commit.
                                    feature
A ─ ─ ─ B ─ ─ ─ E ─ ─ ─ F ─ ─ ─ G
                                    master
You can force git to create a merge commit during a fast forward merge for
record-keeping purposes. Then git merge --no-ff feature will create a merge
commit even when the merge resolves as a fast-forward.
           E ─ ─ ─ F ─ ─ ─ G     feature
         ╱                  ╲
A ─ ─ ─ B ─ ─ ─ ─ ─ ─ ─ ─ ─ ─ H  master
A squash merge allows you to condense the Git history into 1 commit.
Assume the following history exists and the current branch is master:
           E ─ ─ ─ F ─ ─ ─ G   feature
         ╱
A ─ ─ ─ B ─ ─ ─ C ─ ─ ─ D      master
Then git merge feature --squash will take all the commits from feature,
squash them into staged changes, and you need to create a new commit (H).
Unlike a regular merge, H has no reference to the feature branch commits—it's
a completely new commit containing all the changes.
           E ─ ─ ─ F ─ ─ ─ G        feature (unchanged, no connection to H)

A ─ ─ ─ B ─ ─ ─ C ─ ─ ─ D ─ ─ ─ H master (H contains E+F+G changes)Tip: When squash merging, it's a good practice to delete the source branch.
Since H has no parent relationship to the feature branch, keeping the feature
branch around can cause confusion—Git won't recognize it as merged.
git rebase
While git rebase solves the same problem as git merge, it works
differently.
Assume the following history exists and the current branch is feature:
           E ─ ─ ─ F ─ ─ ─ G   feature
         ╱
A ─ ─ ─ B ─ ─ ─ C ─ ─ ─ D      master
git rebase master will move the entire feature branch to begin on the tip
of the master branch. But, instead of using a merge commit, rebasing re-writes
the project history by creating a brand new commit for each commit in the
original branch. It is a good practice to rebase your feature branch against
develop to avoid merge conflicts and to simplify the pull request.
                          E' ─ ─ ─ F' ─ ─ ─ G'   feature
                         ╱
A ─ ─ ─ B ─ ─ ─ C ─ ─ ─ D                        master
Benefits:
- you get a much cleaner project history
- you can follow the tip of feature to the beginning of the project without any fork
Warning: The golden rule of git rebase is to never use it on public
branches. So, before you run git rebase, always ask yourself, "Is anyone else
looking at this branch?"
Advanced user
Cherry pick
git cherry-pick allows you to directly apply the changes introduced by some
existing commit.
Assume the following history exists and the current branch is feature.
           F ─ ─ ─ G ─ ─ ─ H        feature
         ╱
A ─ ─ ─ B ─ ─ ─ C ─ ─ ─ D ─ ─ ─ E   master
Let's say you want to apply only commit C but not D. Too many people
will just manually apply the changes that were made on top of their branch. The
right way to do this is to use cherry-pick.
$ git branch --show-current
feature

$ git log --oneline
a1b2c3d Add tests
b2c3d4e Implement feature
c3d4e5f Init feature

# Use the actual SHA of commit C from master
$ git cherry-pick <sha-of-C>

$ git log --oneline
f6g7h8i Important fix        # New commit with changes from C
a1b2c3d Add tests
b2c3d4e Implement feature
c3d4e5f Init feature
Now our history is (note that C' is a new commit with a different SHA than C):
           F ─ ─ ─ G ─ ─ ─ H ─ ─ ─ C'  feature
         ╱
A ─ ─ ─ B ─ ─ ─ C ─ ─ ─ D ─ ─ ─ E masterTip: You can pass a list of commits to cherry-pick.
# Apply the changes introduced by the fifth and third last commits pointed to by master and create 2 new commits with these changes.
$ git cherry-pick master~4 master~2
Rewriting history
Changing the last commit
The git commit --amend command is a convenient way to modify the most recent
commit. It lets you:
- combine staged changes with the previous commit instead of creating an entirely new commit
- edit the previous commit message without changing its snapshot
You want to edit the commit message.
$ git log --oneline
fb2f677 The wrong message
ac5db87 Previous commit

$ git commit --amend -m "The right message"

$ git log --oneline
733e2ff The right message
ac5db87 Previous commit
You forgot to stage some files
$ git log --oneline
fb2f677 An important feature # Doesn't contain importantFile.txt
ac5db87 Previous commit

$ git add importantFile.txt

# You don't want to change the commit message. If you want, use -m instead of --no-edit
$ git commit --amend --no-edit

$ git log --oneline
733e2ff An important feature # Contains importantFile.txt
ac5db87 Previous commit
Changing older commit
The git commit --fixup command, like git commit --amend, allows you to
edit a single commit, but this time it doesn't have to be the last one. It can be
any commit!
After some time, you realize you made a typo, forgot to include a file, or something similar in an old commit "Feature A is done".
$ git log --oneline
733e2ff Feature B is done
fb2f677 Feature A is done
ac5db87 Previous commit
Make your changes, use --fixup, and voilà!
$ git commit --fixup fb2f677

$ git log --oneline
c5069d5 fixup! Feature A is done
733e2ff Feature B is done
fb2f677 Feature A is done
ac5db87 Previous commit
Now you want to clean your branch: use --autosquash option!
$ git rebase -i --autosquash ac5db87
pick fb2f677 Feature A is done
fixup c5069d5 fixup! Feature A is done
pick 733e2ff Feature B is done

$ git log --oneline
ff4de2a Feature B is done
5478cee Feature A is done
ac5db87 Previous commitTip: You can add this alias to your .gitconfig to make it even simpler!
[alias]
# Usage: git fixup {sha1}
        fixup = !sh -c 'SHA=$(git rev-parse $1) \
                && git commit --fixup $SHA \
                && git rebase -i --autosquash $SHA~' -
Changing older or multiple commits
Interactive rebasing can be used for changing commits in many ways such as
editing, deleting and squashing. To start an interactive rebase you need to use
the SHA-1 of the commit before the oldest (first) commit you want to
modify. You can use ~ to reference the parent commit.
The git rebase -i command will show you commits from oldest to newest and will
apply them in this order when rebasing.
$ git log --oneline
fe0a967 5
228399c 4
6a59879 3
055610e 2
57b5a07 1

$ git rebase -i 57b5a07~
pick 57b5a07 1
pick 055610e 2
pick 6a59879 3
pick 228399c 4
pick fe0a967 5

# Rebase 9f812ce..fe0a967 onto 228399c (5 commands)
#
# Commands:
# p, pick <commit> = use commit
# r, reword <commit> = use commit, but edit the commit message
# e, edit <commit> = use commit, but stop for amending
# s, squash <commit> = use commit, but meld into previous commit
# f, fixup <commit> = like "squash", but discard this commit's log message
# x, exec <command> = run command (the rest of the line) using shell
# b, break = stop here (continue rebase later with 'git rebase --continue')
# d, drop <commit> = remove commit
# l, label <label> = label current HEAD with a name
# t, reset <label> = reset HEAD to a label
# m, merge [-C <commit> | -c <commit>] <label> [# <oneline>]
# .       create a merge commit using the original merge commit's
# .       message (or the oneline, if no original merge commit was
# .       specified). Use -c <commit> to reword the commit message.
#
# These lines can be re-ordered; they are executed from top to bottom.
#
# If you remove a line here THAT COMMIT WILL BE LOST.
#
# However, if you remove everything, the rebase will be aborted.
#
# Note that empty commits are commented out
With pick you can change the order of the commits. For example, we can switch
3 and 4 by reordering the lines in the editor:
$ git rebase -i 57b5a07~
# Original order shown in editor:
pick 57b5a07 1
pick 055610e 2
pick 6a59879 3
pick 228399c 4
pick fe0a967 5

# Change to (swap lines for 3 and 4):
pick 57b5a07 1
pick 055610e 2
pick 228399c 4
pick 6a59879 3
pick fe0a967 5

# After saving and closing the editor:
$ git log --oneline
bf45260 5
6df345c 3
7e49b2a 4
055610e 2
57b5a07 1
With reword you can change a commit message. For example, change "2"
to "A new message for 2":
$ git rebase -i 57b5a07~
# Change 'pick' to 'reword' (or 'r') for commit 2:
pick 57b5a07 1
reword 055610e 2
pick 6a59879 3
pick 228399c 4
pick fe0a967 5

# Git will open your editor to change the message for commit 2

$ git log --oneline
bf45260 5
6df345c 3
7e49b2a 4
055610e A new message for 2
57b5a07 1
edit will allow you to edit a commit: making changes, adding new things to it,
or splitting it into several commits.
$ git rebase -i 57b5a07~
pick 57b5a07 1
pick 055610e 2
e 6a59879 3
pick 228399c 4
pick fe0a967 5

# Edit your sources

$ git commit --amend
$ git rebase --continue
squash and fixup both allow you to merge commits. The only difference is
that squash will let you change the message.
$ git rebase -i 57b5a07~
pick 57b5a07 1
pick 055610e 2
s 6a59879 3
pick 228399c 4
pick fe0a967 5

# Save your new message

$ git log --oneline
bf45260 5
7e49b2a 4
055610e 2 with 3 merged into it
57b5a07 1
$ git rebase -i 57b5a07~
pick 57b5a07 1
pick 055610e 2
f 6a59879 3
pick 228399c 4
pick fe0a967 5
$ git log --oneline
bf45260 5
7e49b2a 4
055610e 2 # 3 has merged into 2
57b5a07 1Finally, drop will allow you to delete a commit.
$ git rebase -i 57b5a07~
pick 57b5a07 1
pick 055610e 2
d 6a59879 3
pick 228399c 4
pick fe0a967 5

$ git log --oneline
bf45260 5
7e49b2a 4
055610e 2
57b5a07 1
Good to know:
git rebasewill change the SHA-1 of your commits, so if you already pushed your branch, you'll need to do agit push -f.- During
git rebase, Git will replay the commits from bottom to top (in the order they were created). - You can, of course, mix multiple commands: reword a commit message, squash several commits, etc.
Understanding the staging area
Saving files
Git keeps track of your source tree in several locations locally:
- Working copy: the directory tree of files that you see and edit.
- Index (staging area): a single, large, binary file in
<baseOfRepo>/.git/index, which lists all files in the current branch, their SHA-1 checksums, timestamps and the file name — it is not another directory with a copy of files in it. - HEAD: a reference (pointer) to the current commit, stored in
.git/HEAD. It usually points to a branch name, which in turn points to a commit. - Object store: the
.git/objectsdirectory containing all versions of every file in the repository as compressed "blob" files, along with commits and trees.
Suppose the following state, where oldFile.txt is already committed and we have a newFile.txt.
+----------------+                    +----------------+                    +----------------+
|  Working copy  |                    |      Index     |                    |      HEAD      |
| oldFile.txt V1 |                    | oldFile.txt V1 |                    | oldFile.txt V1 |
| newFile.txt V1 |                    |                |                    |                |
+----------------+                    +----------------+                    +----------------+
When using git add -u . only tracked files that have changed are staged.
Untracked files (like newFile.txt) remain only in the working directory.
+----------------+                    +----------------+                    +----------------+
|  Working copy  |    git add -u .    |      Index     |                    |      HEAD      |
| oldFile.txt V2 +------------------->+ oldFile.txt V2 |                    | oldFile.txt V1 |
| newFile.txt V1 |                    |                |                    |                |
+----------------+                    +----------------+                    +----------------+
Using git reset will remove oldFile.txt (V2) from the index.
+----------------+                    +----------------+                    +----------------+
|  Working copy  |    git reset .     |      Index     |                    |      HEAD      |
| oldFile.txt V2 +<-------------------+ oldFile.txt V1 |                    | oldFile.txt V1 |
| newFile.txt V1 |                    |                |                    |                |
+----------------+                    +----------------+                    +----------------+
git add . adds all files into the index.
+----------------+                    +----------------+                    +----------------+
|  Working copy  |    git add .       |      Index     |                    |      HEAD      |
| oldFile.txt V2 +------------------->+ oldFile.txt V2 |                    | oldFile.txt V1 |
| newFile.txt V1 |                    | newFile.txt V1 |                    |                |
+----------------+                    +----------------+                    +----------------+
git commit saves the changes into HEAD.
+----------------+                    +----------------+                    +----------------+
|  Working copy  |                    |      Index     |    git commit      |      HEAD      |
| oldFile.txt V2 |                    | oldFile.txt V2 +------------------->+ oldFile.txt V2 |
| newFile.txt V1 |                    | newFile.txt V1 |                    | newFile.txt V1 |
+----------------+                    +----------------+                    +----------------+
Undo changes
There are several tools to undo changes: git reset, git checkout,
git revert, and since Git 2.23, git restore and git switch. The following
table sums up the common use cases for these commands.
| Command | Scope | Use case |
|---|---|---|
| git reset | Commit-level | Discard commits in a private branch or throw away uncommitted changes. You can use the following options: - --soft: use this when you made bad commits but the work's good and all you need to do is recommit it differently.- --mixed (default option if you don't specify it): use this when you made bad commits but want to keep all the work you've done so you can fix it up and recommit. - --hard: it will throw away your work by resetting the working copy, the index and the HEAD to the specified commit. |
| git reset | File-level | Unstage a file. It is commonly used with HEAD to retrieve the last committed version of a file. The options --soft, --mixed and --hard are ignored when a path is specified. The index will always be updated and the working copy never updated. |
| git checkout | Commit-level | Useful for quickly inspecting an old version of your project but it will put you in a detached HEAD state. This can be dangerous if you start adding new commit because there is no way to get them back after switching to another branch. For this reason, you should always create a new branch before adding commits to a detached HEAD. Note: prefer git switch for switching branches (Git 2.23+). |
| git checkout | File-level | Discard changes in the working directory. Similar to git reset on a file except that it will update the working directory instead of the index. Note: prefer git restore for restoring files (Git 2.23+). |
| git restore | File-level | (Git 2.23+) Restore working tree files. Use git restore <file> to discard changes in working directory, or git restore --staged <file> to unstage. This command replaces git checkout -- <file> with clearer semantics. |
| git switch | Commit-level | (Git 2.23+) Switch branches. Use git switch <branch> to switch, or git switch -c <branch> to create and switch. This command replaces git checkout <branch> with clearer semantics. |
| git revert | Commit-level | Reverting undoes a commit by creating a new commit. This is a safe way to undo changes. Because it doesn't alter existing commit history, it should be used on public branches; use reset on private branches. |
Best practices
Define the editor Git uses
I know that you love vi, but I'm sure you prefer Visual Studio Code to write
your commit messages, merge, or compare a diff.
# Set the editor Git will always use to edit messages
git config --global core.editor "code --wait"

# Set the editor for diff and merge-conflict-resolution
git config --global merge.tool vscode
git config --global mergetool.vscode.cmd "code --wait $MERGED"
git config --global diff.tool vscode
git config --global difftool.vscode.cmd "code --wait --diff $LOCAL $REMOTE"
Git flow
Git flow is a collection of Git extensions to provide high-level repository operations. It will help you normalize your branch names across your team.
Note: git-flow is installed locally; everyone has to install and configure it. The original nvie/gitflow is unmaintained; consider using the actively maintained git-flow-avh fork instead.
Install Git flow
On Windows
Install git-flow-avh using Chocolatey:
choco install git-flow-avhOr via Git for Windows which includes git-flow.
On Mac OS X
The easiest way to install Git flow on a Mac is via Homebrew:
# Install the maintained AVH edition
brew install git-flow-avh
Useful Git flow commands
# Initialize a new repository with the basic branch structure
git flow init -d

# Create a feature ABC from an updated develop branch
# It will create a branch feature/ABC from develop (up-to-date)
git flow feature start -F ABC

# Create a hotfix for the version 1.0.0
# It will create a branch hotfix/1.0.0 from master (up-to-date)
git flow hotfix start -F 1.0.0

# Create a feature XYZ for this updated hotfix branch
# It will create a branch feature/XYZ from hotfix/1.0.0 (up-to-date)
git flow feature start -F XYZ hotfix/1.0.0
Commit messages
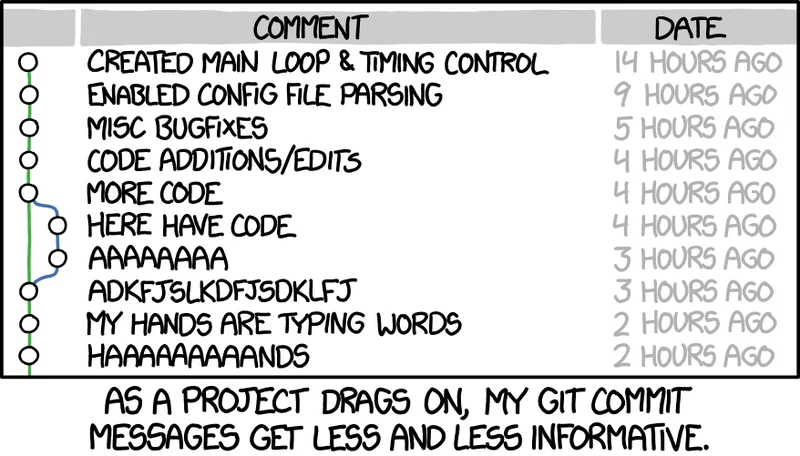
To have a clean Git history we follow the Conventional commit message guidelines.
Commit message format
Each commit message consists of a header, a body and a footer. The header has a special format that includes a type, a scope and a subject:
<type>(<scope>): <subject>
<BLANK LINE>
<body>
<BLANK LINE>
<footer>Tip: You can create a template Git message with the following to help you use the template.
Create a file .gitmessage.txt in your home folder with the following
<type>(<scope>): <subject>

<body>

<footer>

# ***Commit message rules***
# - Keep lines shorter than 100 characters.
# - Only the header is mandatory.
# - Type is mandatory and must be one of the following:
#   - build: Changes that affect the build system or external dependencies
#   - ci: Changes to our CI configuration files and scripts
#   - docs: Documentation only changes
#   - feat: A new feature
#   - fix: A bug fix
#   - perf: A code change that improves performance
#   - refactor: A code change that neither fixes a bug nor adds a feature
#   - style: Changes that do not affect the meaning of the code (white-space, formatting, missing semi-colons, etc)
#   - test: Adding missing tests or correcting existing tests
Then add it to your Git configuration
git config --global commit.template ~/.gitmessage.txtThe header is mandatory and the scope of the header is optional.
Any line of the commit message cannot be longer than 100 characters! This allows the message to be easier to read in git tools.
Revert
If the commit reverts a previous commit, it should begin with revert:,
followed by the header of the reverted commit. In the body, it should
say: This revert commit <hash>., where the hash is the SHA of the commit being
reverted. A commit with this format is automatically created by
the git-revert
command.
Type
Must be one of the following.
- build: Changes that affect the build system or external dependencies
- ci: Changes to our CI configuration files and scripts
- docs: Documentation only changes
- feat: A new feature
- fix: A bug fix
- perf: A code change that improves performance
- refactor: A code change that neither fixes a bug nor adds a feature
- style: Changes that do not affect the meaning of the code (white-space, formatting, missing semi-colons, etc)
- test: Adding missing tests or correcting existing tests
If you need to use several types, it's probably that your commit is too big and should be split up.
Scope
The scope could be anything specifying the place of the commit change. You should define the scopes for your project.
You can use * when the change affects more than a single scope.
Subject
The subject contains a succinct description of the change:
- use the imperative, present tense: "change" not "changed" nor "changes"
- don't capitalize the first letter
- no dot (.) at the end
Body
Just as in the subject, use the imperative, present tense: "change" not "changed" nor "changes". The body should include the motivation for the change and contrast this with previous behavior.
Footer
The footer should contain any information about Breaking Changes and is also the place to reference issues that this commit closes.
Breaking Changes should start with the word BREAKING CHANGE: with a space
or two newlines. The rest of the commit message is then used for this.
References
- Pro Git book 2nd Edition
- Git dammit! by Maxime Ghignet
- Dealing with line endings
- Caching your GitHub password in Git
- Getting Git Right
- How to Write a Git Commit Message
- Git Commit Guidelines
- Git flow
- Git flow AVH Edition
- What's the difference between HEAD, working tree and index, in Git?
- In plain English, what does "git reset" do?